My website is finally up and running! At this point, it is really simple, but I am so pleased to have something to start advertising. I love weddings and event planning, so I hope that this will lead to many more opportunities for me. Check it out!
www.pinkpetalseventdesign.com
Wednesday, January 21, 2009

Sunday, January 18, 2009
DIY Thank You Parasol
Make your own painted parasol to use for photo opportunities. Think of all the varieties. Write "Thank You" on one and pose with it for your thank you cards. Write your initial on them and give them to all your bridesmaids or the guests. Write "Just Married" or your new last name on one and use it for a pretty picture. It is actually an easy project that can be completed in one evening.

Materials needed:
White (or another very light color) paper parasol. I got mine from www.lunabazaar.com
Acrylic paint - any color can be used, but darker colors show up better in pictures
Paint brushes - I suggest one medium and one extremely thin one
Computer and printer
Scotch tape
Directions:
1 - Type whatever you want on the computer in extremely large letters. To make it large enough to look right, it will actually print larger than a piece of paper. Don't worry about that. Just tape the pages together until they fit. I found that I also needed to bold the letters to make it look right.
2 - Tape the word to the underside of the parasol. Play with the placement until it looks even.
3 - Use the extremely thin paint brush to trace the letter outline. Then use the wider paint brush to fill the letters in.
That's it! At times, there will be a little guess work, but it really is just that simple. No one will probably see your parasol from up close. I noticed a few small details that I got off, but you cannot see them in photos. Good luck!
White (or another very light color) paper parasol. I got mine from www.lunabazaar.com
Acrylic paint - any color can be used, but darker colors show up better in pictures
Paint brushes - I suggest one medium and one extremely thin one
Computer and printer
Scotch tape
Directions:
1 - Type whatever you want on the computer in extremely large letters. To make it large enough to look right, it will actually print larger than a piece of paper. Don't worry about that. Just tape the pages together until they fit. I found that I also needed to bold the letters to make it look right.
2 - Tape the word to the underside of the parasol. Play with the placement until it looks even.
3 - Use the extremely thin paint brush to trace the letter outline. Then use the wider paint brush to fill the letters in.
That's it! At times, there will be a little guess work, but it really is just that simple. No one will probably see your parasol from up close. I noticed a few small details that I got off, but you cannot see them in photos. Good luck!
**Note: This article was also posted as a Project Wedding guide. **
Photobooth
Many people have mentioned a desire to have a photobooth at their wedding. It is a great way to loosen people up and preserve fun memories of the event. However, the cost is prohibitive to many people. They are often $1500 and up. However, it is possible to do it DIY for less:
1) Create the setting. Find a nice pretty fabric that can be strung up between two trees, across a corner of a room, or between two PVC poles. Make sure the fabric is not too busy - either plain or sith a slight pattern look best. You can go with the photo booth traditional colors of maroon or black. Or you can choose a fabric that matches your wedding colors. Make sure that the fabric is dark. Most photos will come out better that way.
2) Collect props if you want silly pictures. Hats, boas, sunglasses, and other props make for great pictures. This picture is from a hat party we attended, but I can imagine items like this in the photo booth. A great time to buy these items is right after Halloween.

3) Decide on who you want to man the area. Perhaps your photographer has an assistant that can be stationed here. You can also check Craigslist for a new photographer who might be willing to do it for free or for a low cost. Maybe you have a set of friends you want to have run the area during happy hour. It is possible to do a photobooth with a tripod and timer camera as well, but this might discourage people who are not comfortable with technology to use it.
4) Determine the outcome. You can save all of the there digital pics and print them later. You could upload them to a group photo account, like flickr, so that your guests can print off the pictures that they are in after the wedding. You could also have a photo printer right there. Make sure you have additional ink and photo paper. You could also provide scrapbook pages for the pics to be glued on. Set out stickers and colorful markers that people could use to decorate the pages as your guest book.
1) Create the setting. Find a nice pretty fabric that can be strung up between two trees, across a corner of a room, or between two PVC poles. Make sure the fabric is not too busy - either plain or sith a slight pattern look best. You can go with the photo booth traditional colors of maroon or black. Or you can choose a fabric that matches your wedding colors. Make sure that the fabric is dark. Most photos will come out better that way.
2) Collect props if you want silly pictures. Hats, boas, sunglasses, and other props make for great pictures. This picture is from a hat party we attended, but I can imagine items like this in the photo booth. A great time to buy these items is right after Halloween.

3) Decide on who you want to man the area. Perhaps your photographer has an assistant that can be stationed here. You can also check Craigslist for a new photographer who might be willing to do it for free or for a low cost. Maybe you have a set of friends you want to have run the area during happy hour. It is possible to do a photobooth with a tripod and timer camera as well, but this might discourage people who are not comfortable with technology to use it.
4) Determine the outcome. You can save all of the there digital pics and print them later. You could upload them to a group photo account, like flickr, so that your guests can print off the pictures that they are in after the wedding. You could also have a photo printer right there. Make sure you have additional ink and photo paper. You could also provide scrapbook pages for the pics to be glued on. Set out stickers and colorful markers that people could use to decorate the pages as your guest book.
Sunday, January 11, 2009
Using children in the wedding
I have been asked before about great ideas of how to use children in the wedding. Often times, people don't have just one girl and one boy to match the traditional flower girl / ring bearer role.


Other ideas include:
Carry a sign -I have seen "Here Comes the Bride". At HolyMolyMatrimony's wedding, on Project Wedding, a boy carried a sign that said, "Run Jason Run". So cute!

Serve as acolytes

- Read a prayer. With practice, even smaller children can help with this.
- Be fairies

- Carry the lasso, trece arras, or other ceremony items
- Boys can pass stemmed flowers out to the ladies sitting along the aisle
Others want children to carry traditional items in an unusual way.
- Girls that are too small to understand dropping flowers can carry several oversized stems
- Small boys can carry tuxedo clad teddy bears with a ring sewn on the paw
- Oversized rings can be carried. This adorable one was made by Nidia112 from Project Wedding. It will be such a great photo!
- Carry a set of books in a ribbon sling. Budoh from Project Wedding used this adorable set from StyleMePretty as her inspiration (Viola and Phillip's):

She chose one of her favorite children's books and made this precious look:
- Ring orbs
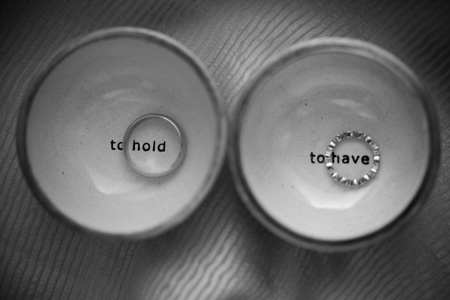
- Items can be used the carry the ring that match the theme of the wedding, for example a baseball glove or a large shell
- A wedding that I am working in a few weeks has a minor theme of bicycling (an activity that they enjoy). The ring bearer will be riding a tricycle down the aisle
Friday, October 17, 2008
Table Numbers
Table numbers are a great way to add a personal touch to a wedding. Below is a list of table number / name ideas that have been generated by myself and other brides to get you thinking:
- Use table numbers, but decorate them with baby pictures from the age that matches the picture. For example, at table #1, there is a picture of both the bride and groom at age 1.
- Use table numbers, but decorate them with baby pictures from the age that matches the picture. For example, at table #1, there is a picture of both the bride and groom at age 1.

- Use years as the table numbers. Put a picture of each of you during that year on the card.
- Use table numbers. Go around town and take a picture of you with that number. I saw one couple take silly shots with a blank board around town and then photoshop in the number on each board. The same thing can be done with your dog hold a sign or the number being on something of significance to you both as you carry it around town (ie. basketball, typewriter)
- Name the table after places that you and your fiancee have traveled to together. Put a picture of you both at that location on the card.
- Name the table after local places that are important to you - ie. restaurant. Put a picture of you both at that location on the card.
- Name the tables after places that represent a shared interest - ie. football stadiums
- Name the table after local tourist attractions. Put a picture of you two at the Golden Gate Bridge, Coit Tower, etc. on each card.
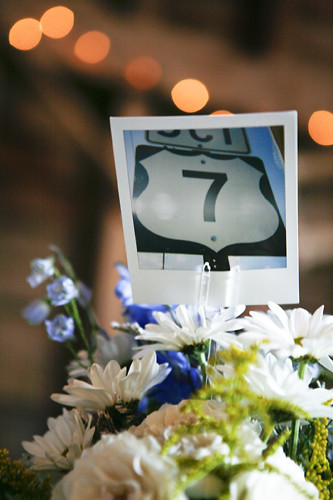
- Use pictures of "found" numbers, like street signs and telephone keys:
- Name the table after places you will go together on your honeymoon. To make this even more special, pick up enough postcards in each location to send one to each person who was at that table. (For example, pick up enough Paris postcards for everyone at the Paris table.) Use these as your thank you notes.
- Name the tables after interesting types of wine and set the wine on the table in order to name it. The table can then share that type of wine during dinner.
- Name the tables after words related to love (ie. patience, kindness) or the word love in other languages.
- Name the tables after a type of flower. Feature that type of flower in that table's centerpiece.
If you have more ideas, I would love to hear them. Please add a comment to add it to the list!
Thursday, October 16, 2008
Pepe and Orkid's wedding

Pepe and Orkid were such a fun couple to work with. This past Sunday, I had the opportunity to join them at the Argonaut Hotel located in the Cannery in San Francisco.
The ballroom had such a great vibe. The centerpieces were vibrant red flowers that were surrounded with red glass lotus flowers that held tea lights. The band that performed was a really great rockabilly band. They also had a photobooth in the back, which was a very popular destination throughout the evening.
This couple also provided me with a really great learning experience. Both the bride and groom were deaf, along with more than half of the guests. To get their attention to move the guests from the cocktail hour to the reception, I had a large fan to wave so that I could get each person to look at me and then read my lips. Once inside, I learned to flash the lights and have the interpreter ready to help make any announcement. The wedding guests helped me get everyone's attention by waving their napkins above their head.

The couple's love of life was so evident. It truly was a joy to watch them celebrate. In fact, it took them almost twenty minutes to make their grand entrance because they were having such a good time dancing around and putting on a show. It was impossible to leave that night without a smile on your face.

This Persian and Spanish couple were married in a traditional Jewish ceremony that took place in a brand new room just off the Cannery courtyard.

Her chuppah was beautiful lace. After rushing around to find a replacement glass for them to step on, the ceremony went off without a hitch.


The ballroom had such a great vibe. The centerpieces were vibrant red flowers that were surrounded with red glass lotus flowers that held tea lights. The band that performed was a really great rockabilly band. They also had a photobooth in the back, which was a very popular destination throughout the evening.
This couple also provided me with a really great learning experience. Both the bride and groom were deaf, along with more than half of the guests. To get their attention to move the guests from the cocktail hour to the reception, I had a large fan to wave so that I could get each person to look at me and then read my lips. Once inside, I learned to flash the lights and have the interpreter ready to help make any announcement. The wedding guests helped me get everyone's attention by waving their napkins above their head.


The couple's love of life was so evident. It truly was a joy to watch them celebrate. In fact, it took them almost twenty minutes to make their grand entrance because they were having such a good time dancing around and putting on a show. It was impossible to leave that night without a smile on your face.

All of the photos were taken by a wonderful photographer names Marc Olivier Le Blanc. Check out his wedding portfolio at http://union.mobafoto.com and his portfolio of other work at http://mobafoto.com
Chris and Ashley's wedding

I had the chance to work with a bride that I met on Project Wedding, a forum where brides can meet and get advice. Chris and Ashley's wedding was breath-taking. It took place at Chateau Felice, in Healdsburg, part of the famous northern California wine country. This working winery is rarely used for weddings so it kept the personal touch. The ceremony took place under a long covered awning. Swagging was used as drapery to highlight the 300 hanging votives that the bride created. Shepherd hooks with the hanging votives lined the aisle. 


The dinner took place on a terrace that overlooked a beautiful lake. The head table was located under a cover with the same swagging. The whole area was flooded with candle light. I lit about 500 luminarias that lined the walkways. They were falling over with the wind off the lake, so the site coordinator and I found some rock salt to go through and re-fill all of the bags to make them heavier. It was hard work, but the result was definitely worth it. 


Later the same area was transformed for dancing.

The dinner took place on a terrace that overlooked a beautiful lake. The head table was located under a cover with the same swagging. The whole area was flooded with candle light. I lit about 500 luminarias that lined the walkways. They were falling over with the wind off the lake, so the site coordinator and I found some rock salt to go through and re-fill all of the bags to make them heavier. It was hard work, but the result was definitely worth it.

The bride made all of her overlays out of beautiful chocolate brown fabric, which added to the rich feel of the wedding.
April, the photographer, really seemed to make the bridal party at ease. When I went back to check on them, they were rocking out to 80s music as the girls took pictures. She really captured the event. I was also incredibly impressed with the DJ, of Sutherland Events. He really seemed to know how to keep the dance floor packed and the couple happy. And happy they were. The joy that the couple was feeling was evident from just a single glance.
See her wedding blogged on Style Me Pretty!
Here, here, here, and here!
April, the photographer, really seemed to make the bridal party at ease. When I went back to check on them, they were rocking out to 80s music as the girls took pictures. She really captured the event. I was also incredibly impressed with the DJ, of Sutherland Events. He really seemed to know how to keep the dance floor packed and the couple happy. And happy they were. The joy that the couple was feeling was evident from just a single glance.
See her wedding blogged on Style Me Pretty!
Here, here, here, and here!
Subscribe to:
Posts (Atom)

